Most of us have old family photos tucked away in albums, drawers or storage bins. These memories—a vital link to our past—lie forgotten: out of sight, out of mind. Photo prints don’t last forever. They fade, develop color casts, and can get damaged or lost. But if you scan and preserve them digitally, they can last forever – and can be one of the best gifts you can give your future generations.
Why You Should Scan Old Photos
1. Preserve Your Family Legacy
Photos are a visual record of your family’s history—celebrating people, places, and events that define who you are. Scanning them keeps those memories alive for generations to come.
2. Protect Against Loss or Damage
Printed photos can fade, discolor, or get damaged over time. Once scanned, they can be digitally restored, backed up, and safely stored in multiple locations.
3. Create a Shared Family Archive
Photos are often scattered across different relatives’ homes. Scanning lets you combine everyone’s collection into one digital archive that can be easily shared and accessed by all.
4. Reprint and Share Irreplaceable Moments
Some photos exist as a single print. Scanning allows you to create high-quality reprints and share those rare moments with friends and family.
5. Declutter and Save Space
Photo albums and boxes take up space and are hard to organize. Digital copies are clutter-free, easy to manage, and can be neatly stored on your computer or cloud drive.
Feeling Overwhelmed? You’re Not Alone
Scanning hundreds (or thousands) of photos sounds daunting. Common obstacles include:
- Too many photos in different places
- Lack of a scanner or software
- Not knowing where to start
- Concern about the time and effort involved
- High cost of professional scanning services
But the good news? You can absolutely do this yourself, even with minimal gear, experience and technical skills. Here are your main options:
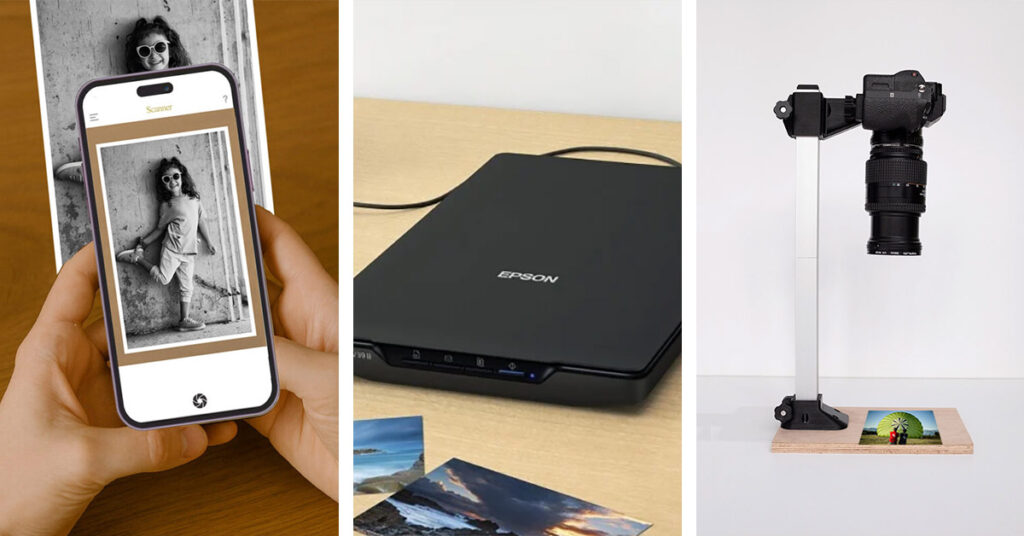
How to Scan Old Photos – Options
1. Use a Flatbed or Feeder Scanner
If you already own a flatbed or auto-feed scanner, you’re off to a great start. These scanners offer high-quality scans and basic editing tools.
- Best for: Loose prints, photo albums
- Pros: High resolution, great detail
- Cons: Slower, more effort, another device to store
Tip: Choose 300 DPI for most scans (Many blogs suggest 600 DPI but believe us it’s overkill and results in unnecessarily large files). Use 400-600 DPI only for very old or small prints.
2. Use a Mobile Photo Scanning App
Apps like Pic Scanner Gold (iOS) and PhotoScan (Android) are quick and surprisingly effective.
- Best for: Quick scanning, social sharing, digital albums
- Pros: Fast, affordable, use a device that you already have
- Cons: Resolution not ideal for large prints or archiving
Tip: Photo scanner apps can auto-crop the scans. For accurate auto-cropping, follow these rules.
3. Use a Digital Camera or Smartphone
Set up a DSLR, mirrorless camera, or smartphone on a tripod to digitize photos.
- Best for: High-resolution scans, large prints, archival use
- Pros: Excellent quality, control over lighting and focus
- Cons: Requires setup and space. No automatic cropping
Tip: Newer iPhone and Google Pixel phones’ cameras rival basic DSLRs for scanning tasks.
4. Use a Professional Photo Scanning Service
If time is short or you have a large photo collection, you may consider this.
- Best for: Large collections, photo albums, negatives, slides, film
- Pros: High-quality results, optional restoration
- Cons: Can be expensive ($0.50 and up/photo), and you’ll need to ship originals
Tip: Check if they’ll scan albums. If they only accept loose photos, taking them out of albums and later on putting them back in will be quite a chore.
Simple DIY Photo Scanning Workflow
Step 1: Sort and Select
Start with 100–200 photos. Organize them by theme (birthdays, vacations, weddings) or timeline with an eye on subsequent organization.
Step 2: Scan the Photos
Use your scanner, camera, or smartphone. Scan 1–4 photos at a time depending on your setup. Save scans to a folder on your computer.
Step 3: Crop and Save Individual Photos
If using a smartphone app, it will automatically crop and save the photos.
If using a scanner or digital camera, manual cropping will take ages. Use SnipTag – an inexpensive macOS app that automates this tedious task (Mac App Store link). Launch the app and drag 10-15 scans at a time into the app. You’ll be amazed how fast all the photos get cropped individually.
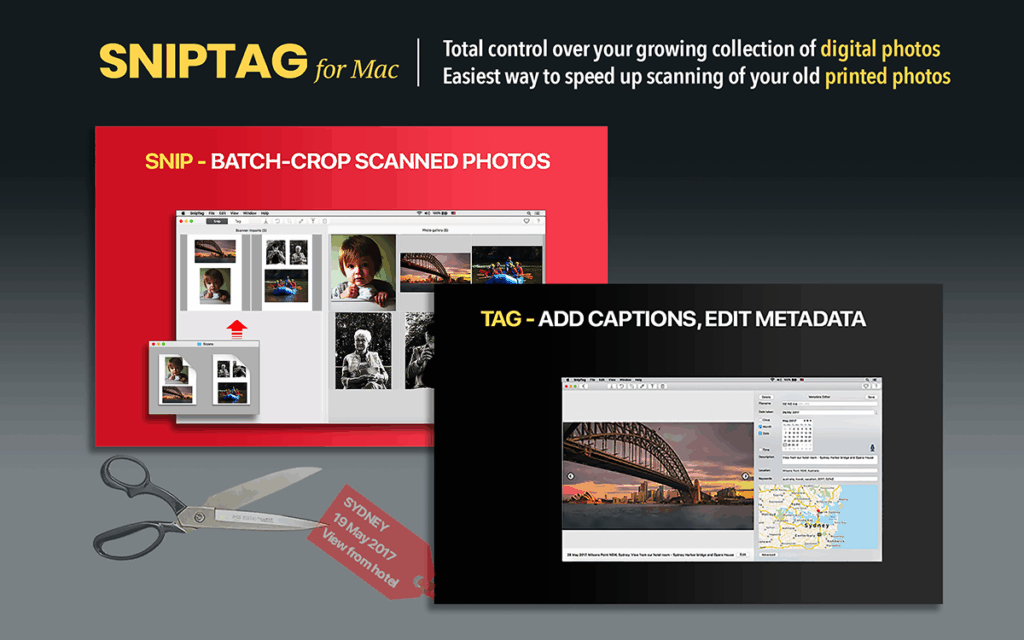
Step 4: Edit Metadata (Dates, Descriptions)
Scanned photos show the date you scanned them—not when they were taken. Use SnipTag’s Tag mode to add correct dates, locations, and descriptions. You can also do this in batch mode – e.g. if you have 20 wedding photos, all taken on the same date and at the same place. Select them all and change their metadata simultaneously.
Step 5: Export and Back Up
Export the cropped, tagged images to a folder. Because the creation dates are now accurate, your photos will appear in the correct chronological order when viewed in any photo app. Back them up to the cloud, an external drive, or both.
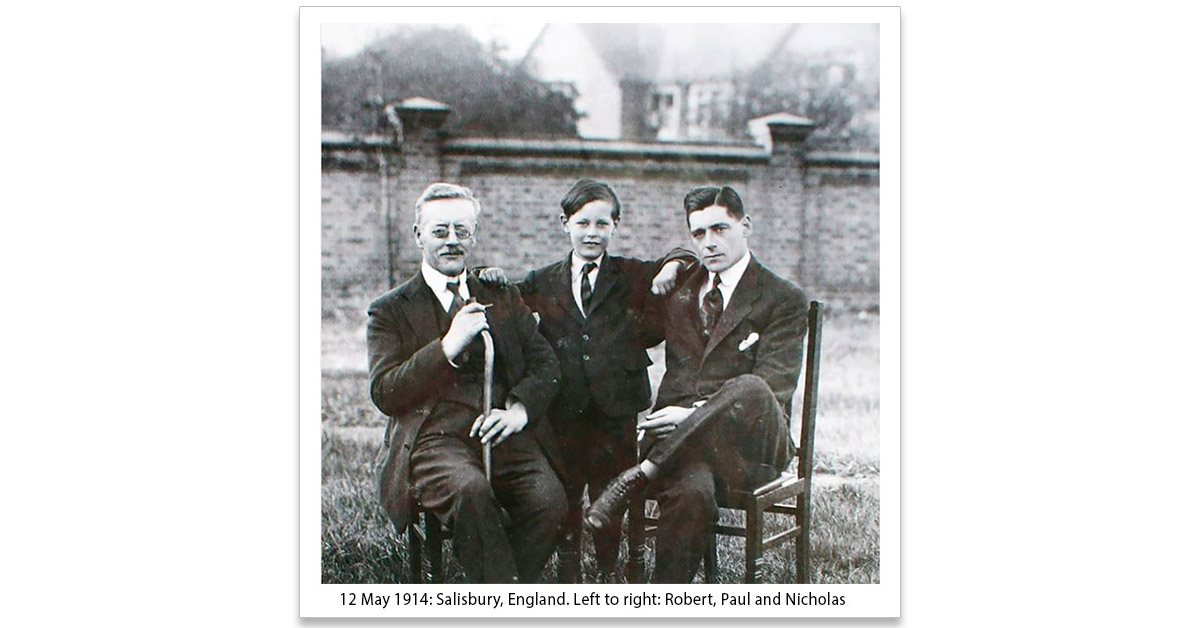
Optional: Use SnipTag to add captions under photos when exporting (See below).
Start Small, Think Big
Scanning old family photos may seem overwhelming at first, but with the right tools and workflow, it’s totally doable. Start small, and you’ll be surprised how quickly you build a meaningful digital archive.